The Duxer iOS app
The bench is rarely where the work starts. The Duxer iOS app gets your operators capturing assets the moment they arrive on site — serials, barcodes, photos — directly against the open project.
Installing
The app is distributed via TestFlight during the private beta. Each tenant admin gets a TestFlight invite link from Settings → Integrations → iOS app. Forward the link to each operator who needs access.
After installation, log in with the same tenant credentials you use on the dashboard. The app pairs to your tenant on first login.
Capturing on site
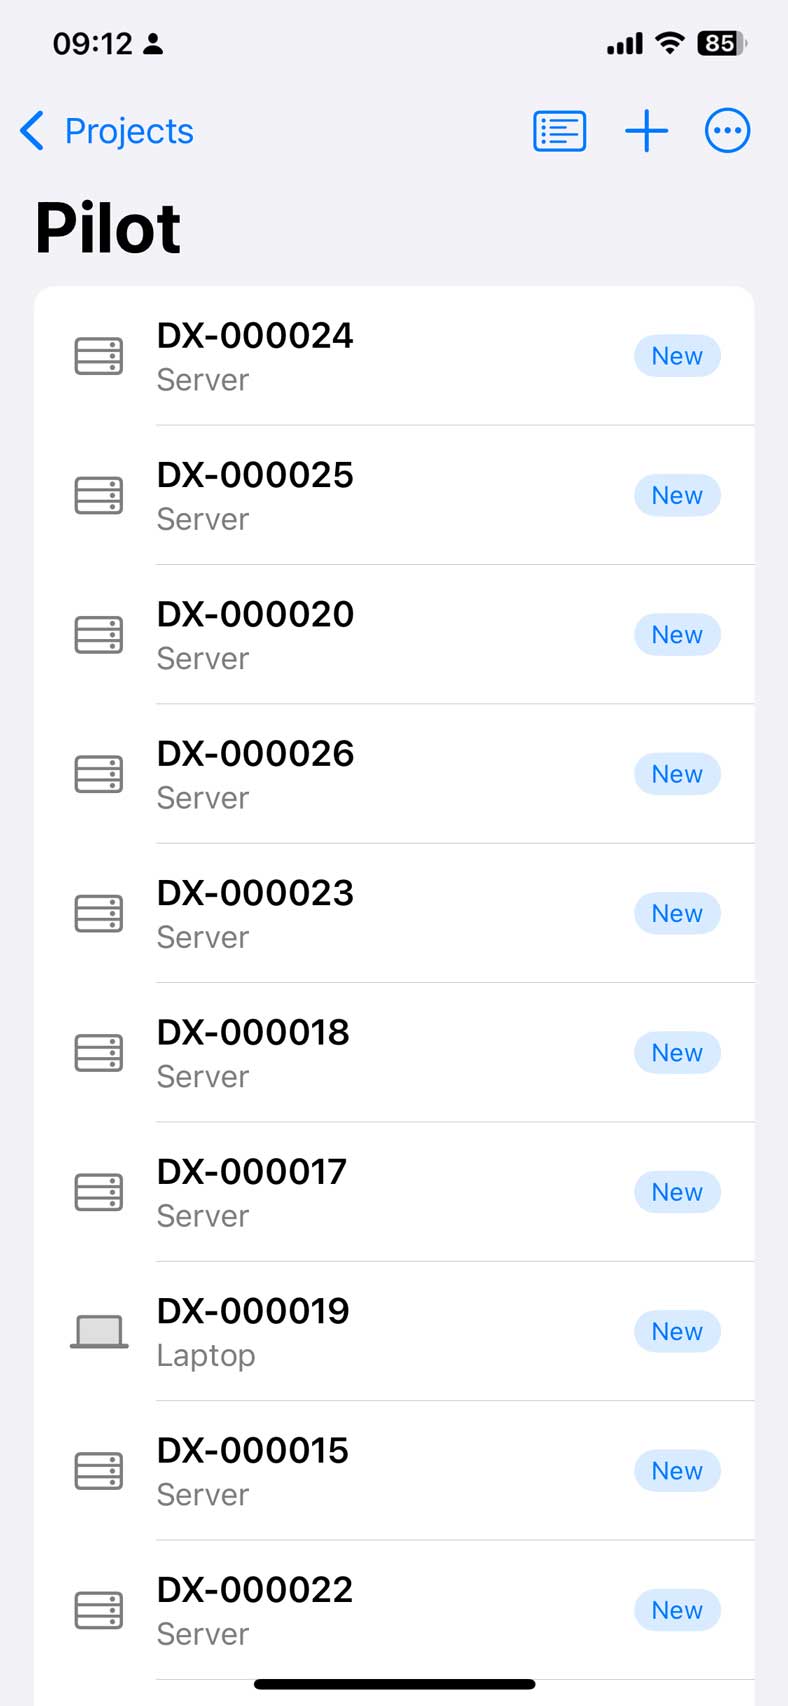
- Open the project — projects show with their client, postcode, and current asset count. Tap to make a project active.
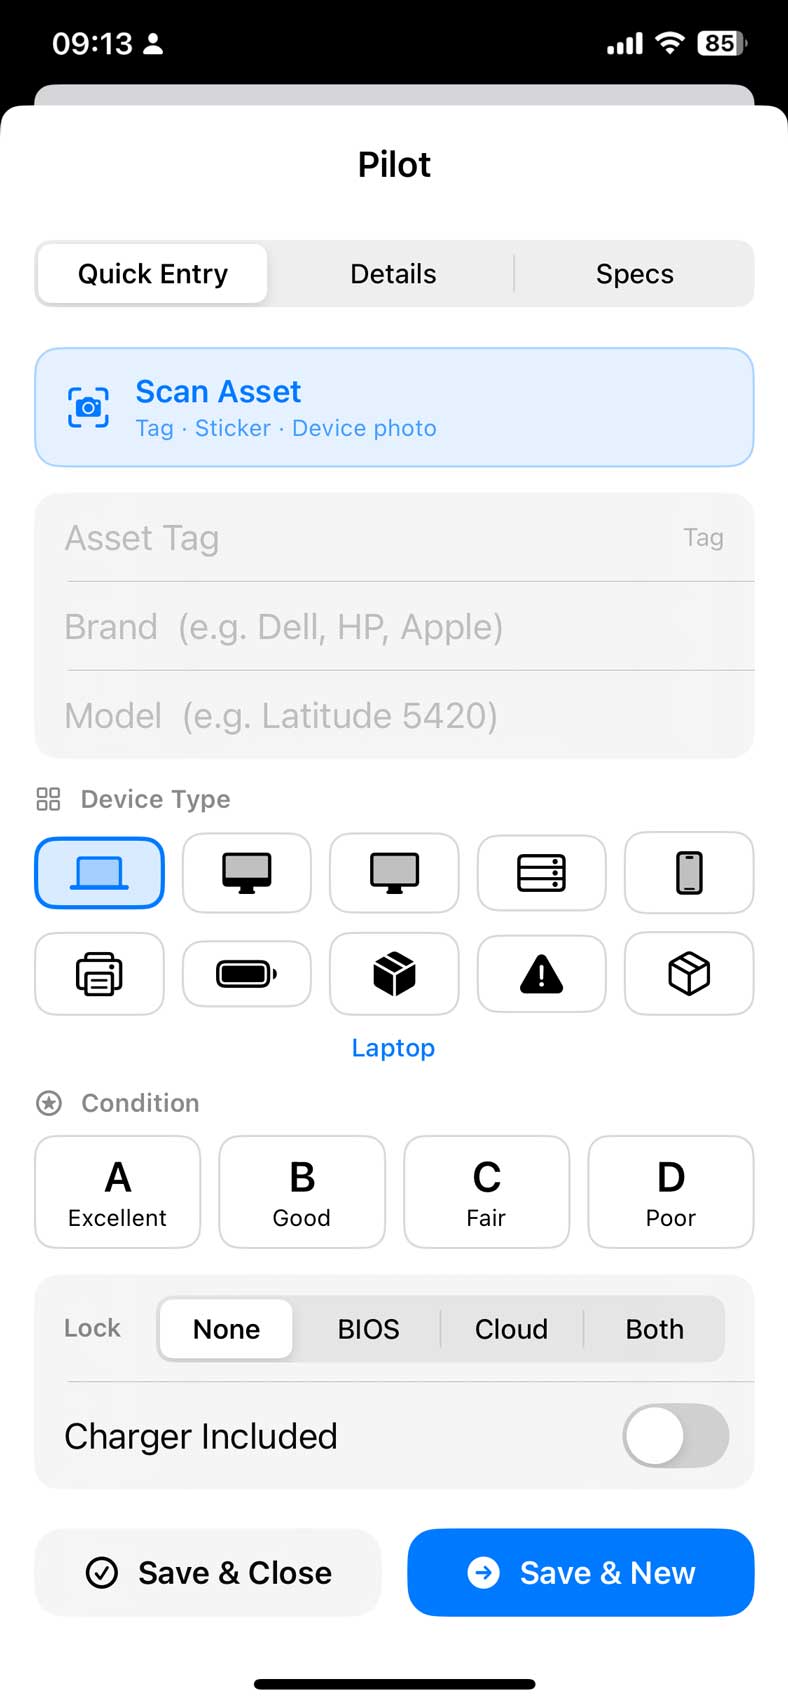
- Scan an asset — the capture screen is camera-first. Point at a barcode, asset tag, or serial number and the app extracts the identifier automatically.
- Confirm the device type — Laptop / Desktop / Server / Monitor / Phone / Other. The default is whatever you most-recently used.
- Add a condition photo — optional but recommended. Photos attach to the asset record and are visible from the dashboard.
- Save — the asset appears in the project on the dashboard.
Each captured asset gets the standard new status and is ready for
bench progression on the dashboard.
Offline tolerance
The app keeps working without connectivity. Captures queue locally and sync when the device next has network. There's no end-of-day data re-entry — you walk back to the office and everything is already in the dashboard.
Operator UX choices
The capture screen is designed for one-handed use with gloves on. Big targets, no fiddly menus, the most-used action (scan and save) is always the prominent one.
Switching projects
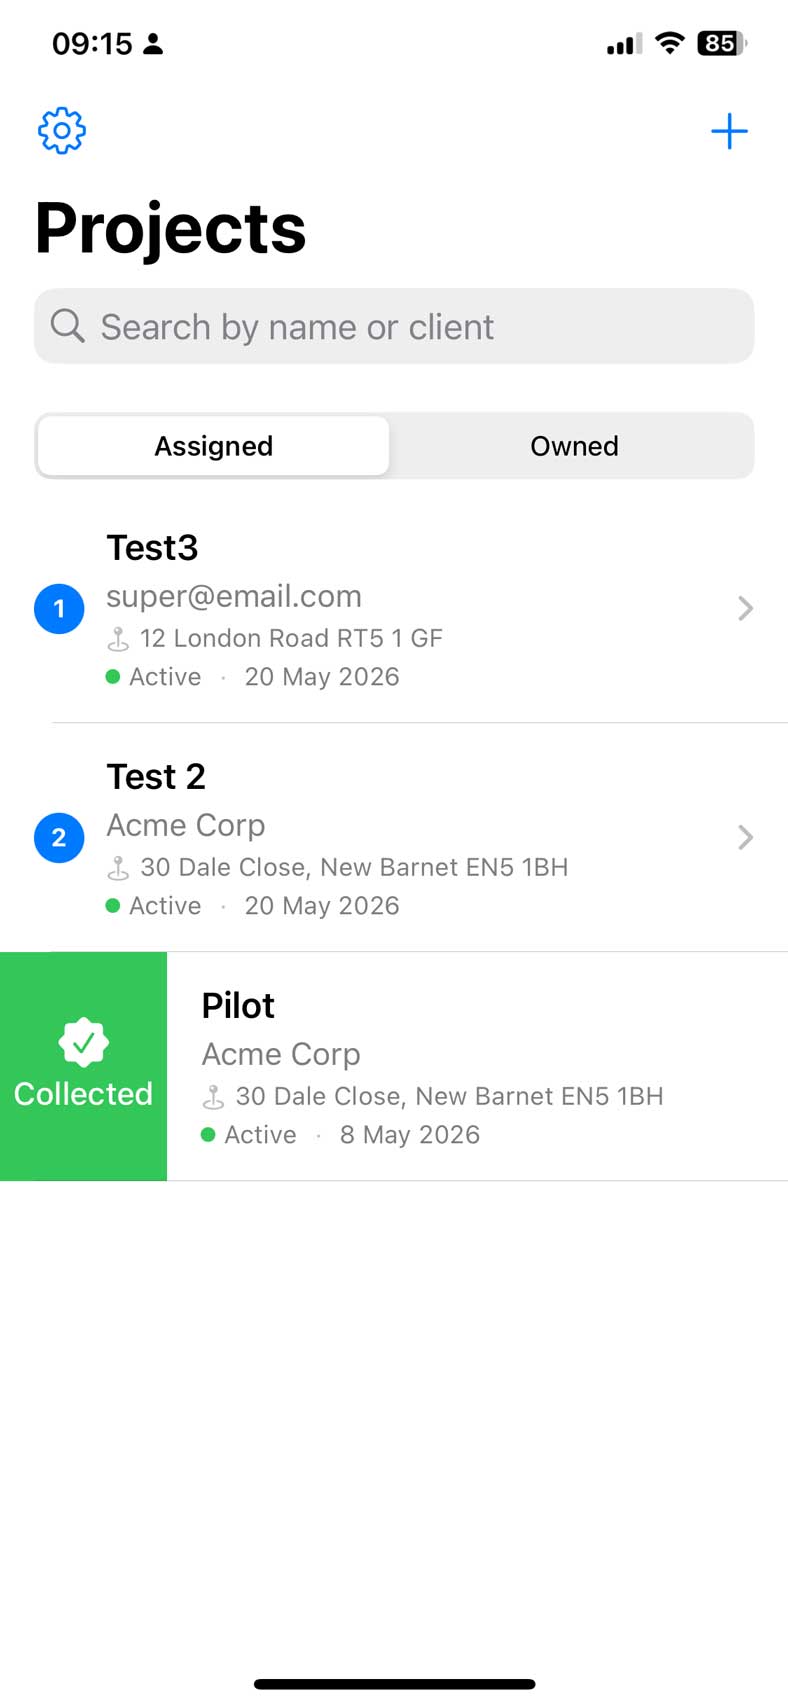
If your operators work multiple sites in a day, project switching happens on-device in two taps. The active project is shown prominently so there's no risk of capturing into the wrong record.
Completing a collection
When loading is done and the van's leaving site, tap Mark collected on the project's home tab. The app does two things at that tap:
- Flips the project's status to
collected— chain-of-custody shifts to your carrier, the WTN/Consignment Note becomes ready to generate from the dashboard. - Records the GPS coordinates of the device at the moment of the tap as the project's collection location. Stamped on the project record and surfaces on the generated Receipt of Waste.
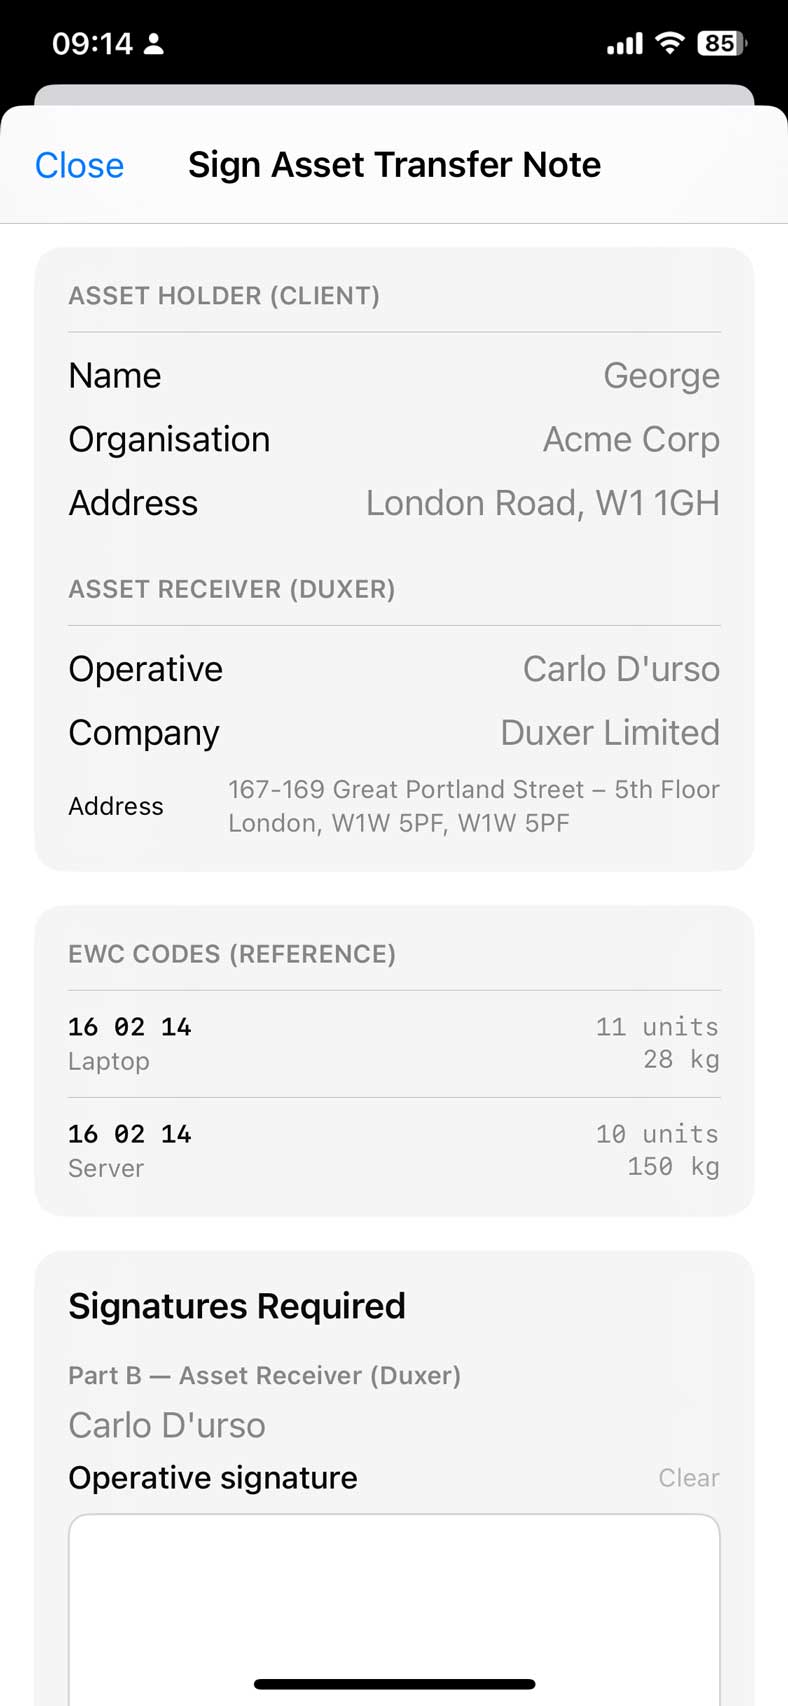
First-time GPS capture prompts for Location permission — grant "While using the app" and you're set for every future collection. If the operator denied it, the app falls back to a manual postcode field instead.
The project then drops out of the iOS list (the warehouse takes over on the dashboard). If you missed an asset and need to add it after marking collected, you have a 24-hour window where the project stays visible on the Assigned tab — beyond that, dashboard-only.
What to read next
- Project intake — the project record the captures attach to.
- Carbon reports — what your captures unlock at the end of the project.