Project intake
Intake in Duxer Cloud is project-led. You don't pile assets into a flat list and reconcile them later — you create a project (one collection, one client, one date), and assets attach to it.
This page covers the practical mechanics. For the why, see For Operators.
Why project-led
The bottom of every ITAD workflow is a single fact: a load of stuff came from a client. Everything else — assets, documents, ESG impact, revenue — attaches to that load. Modelling the project as the unit (rather than the asset) means:
- Waste Transfer Notes generate from data you already entered.
- DEFRA submissions stay grouped correctly.
- Client-facing reports cover the project, not "all assets ever".
- Audit is per-collection, not per-asset detective work.
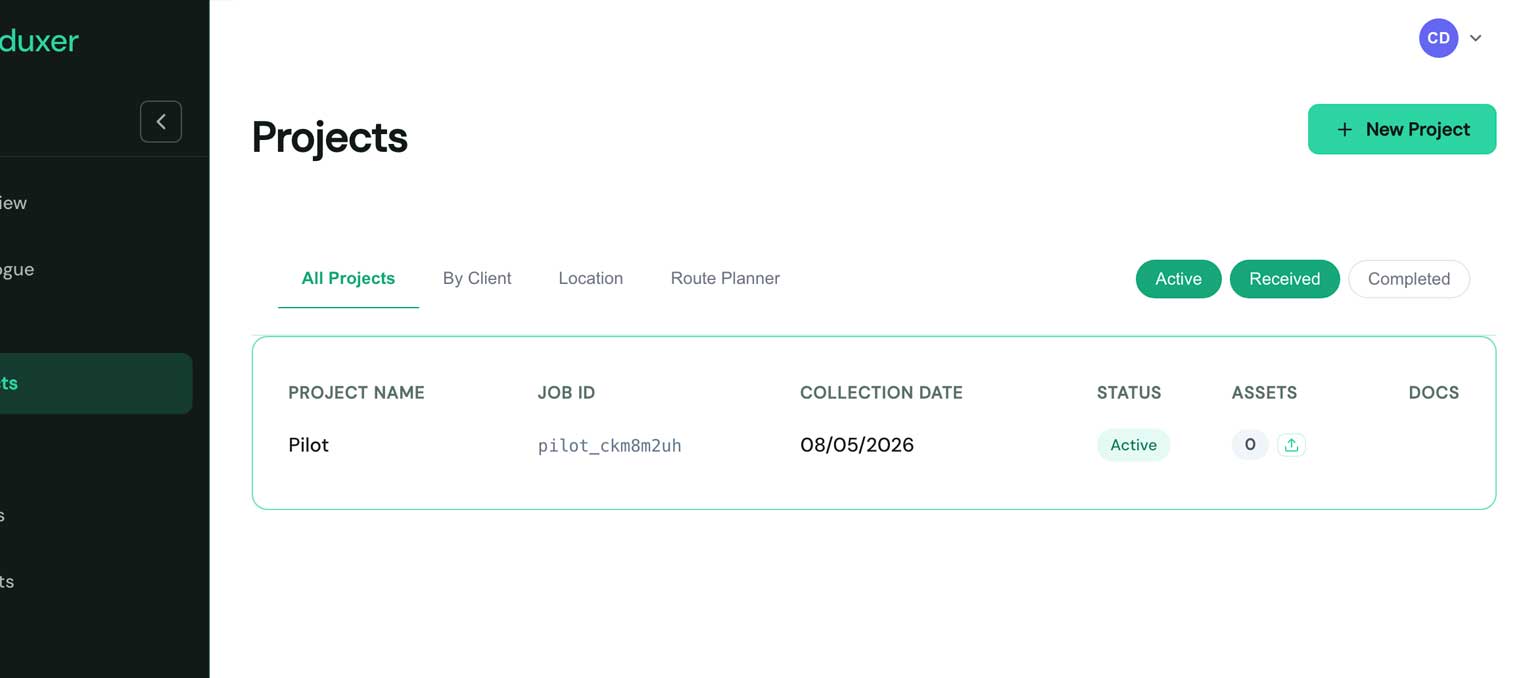
Creating a project
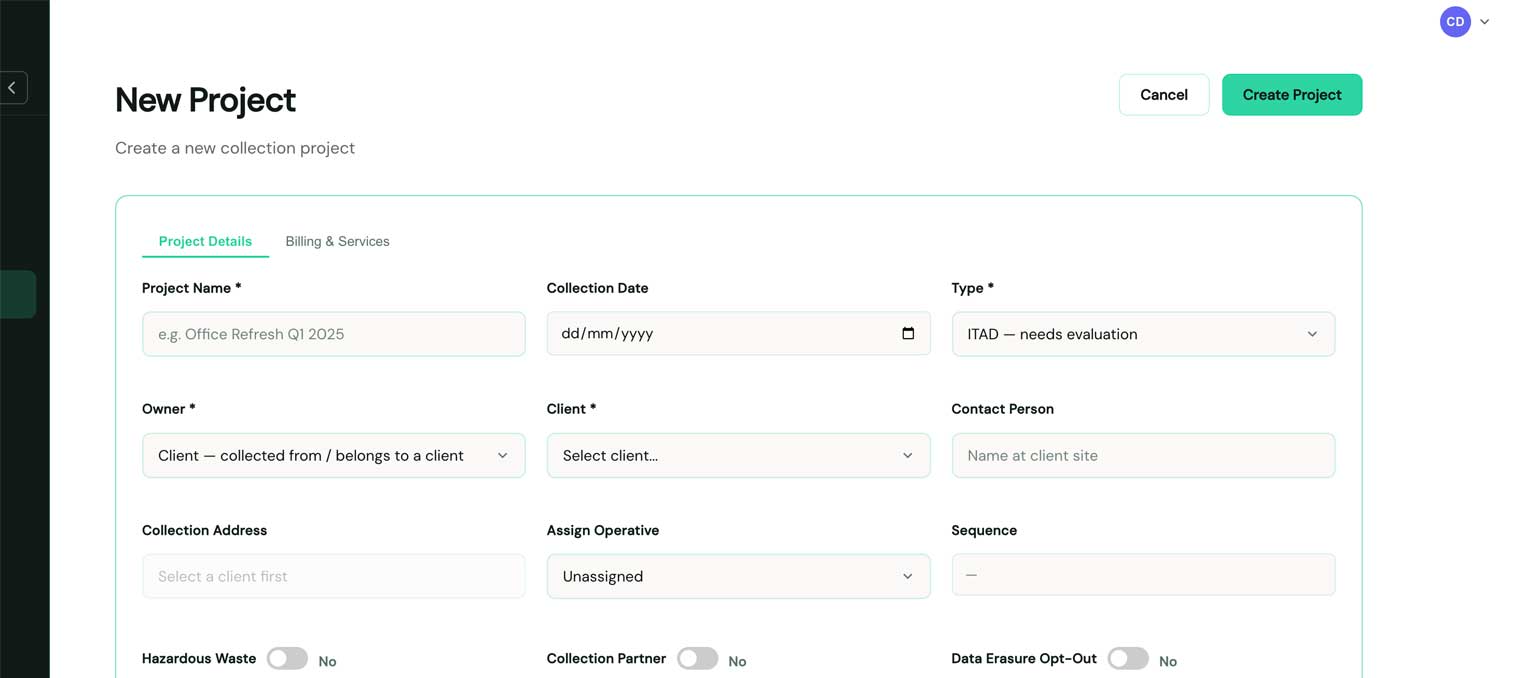
Projects → New project. Required fields:
| Field | Used for |
|---|---|
| Project name | Display + report titles |
| Client name | Links to a client record (or creates one) |
| Start date | Project timeline |
Highly recommended:
- Collection address & postcode — needed for WTN and DEFRA submissions.
- Contact person on site — appears on chain-of-custody documents.
- ATF details — the Authorised Treatment Facility's name, address, postcode, and waste permit number. Pre-fill these on your tenant default and they auto-populate every new project.
Adding assets
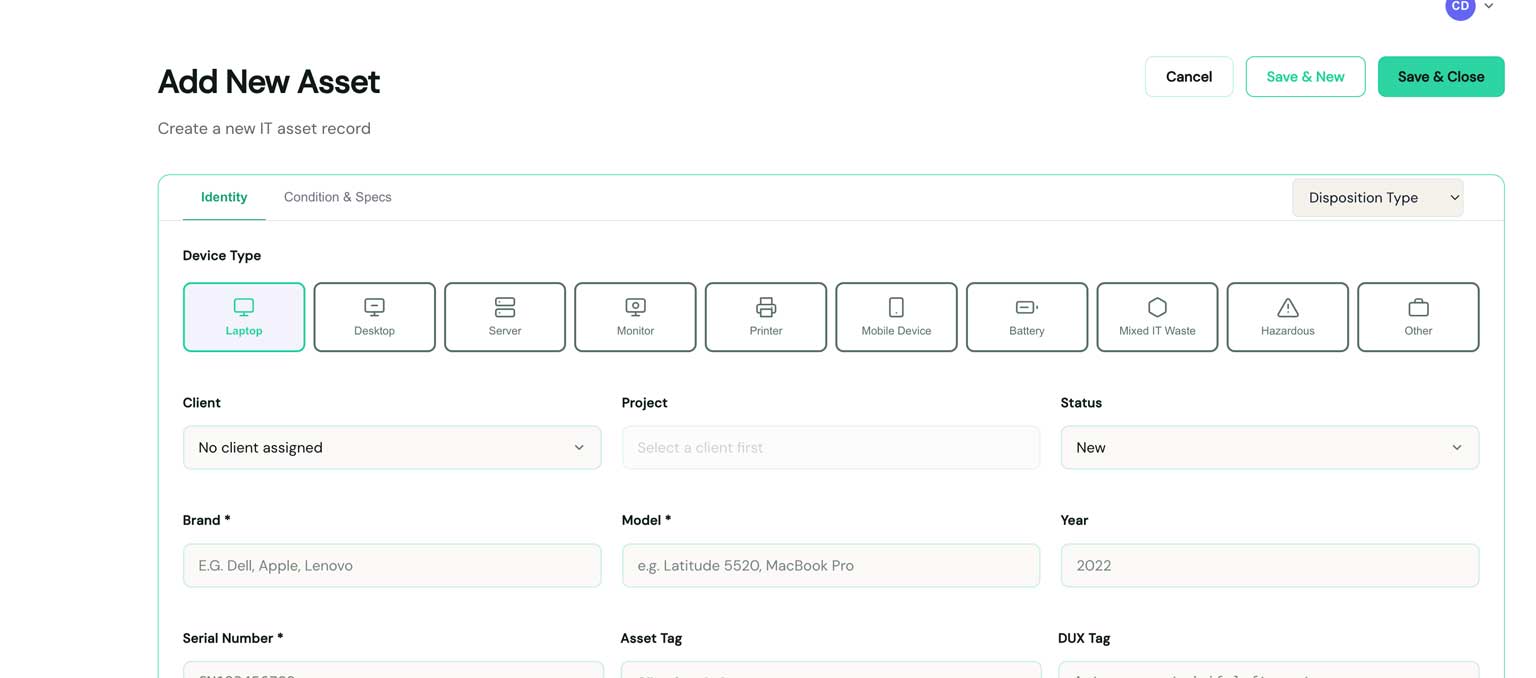
Three ways:
- Manual — Assets → New. Best for low-volume collections.
- CSV import — Assets → Import. We supply a template; map columns once and the import remembers the mapping for that client.
- Mobile scan-in — scan barcodes / serial numbers using the iOS app. Each scan attaches to the currently-open project.
Whichever route you take, every asset gets:
- A device type (Laptop / Desktop / Server / Monitor / Phone / Other).
- A status (
newby default). - A unique tag — printable as a QR sticker for bench tracking.
The status pipeline
Assets progress through a fixed set of statuses. The platform refuses illegal transitions and stamps every change with the operator and timestamp.
Status drives downstream behaviour:
wiped/ready/listed/soldautomatically flipsdata_wipedto true.soldautomatically sets disposition type toremarketed.retired/disposedrequire a disposition type —recycledorscrapped.
You override any of these manually if your workflow needs it; the auto-behaviour exists so the common case takes zero clicks.
Documents
Once your project has a collection address, ATF details, and at least one asset, you can generate:
- Waste Transfer Note — non-hazardous waste collection.
- Hazardous Consignment Note — when the project includes WEEE Annex IIIb hazardous codes.
Both PDF documents carry your branding, your reference number (auto-generated
in DX-{YYYY}-{YYYYMMDD}-{NNNN} format), and a draft → signed → emailed
status workflow.
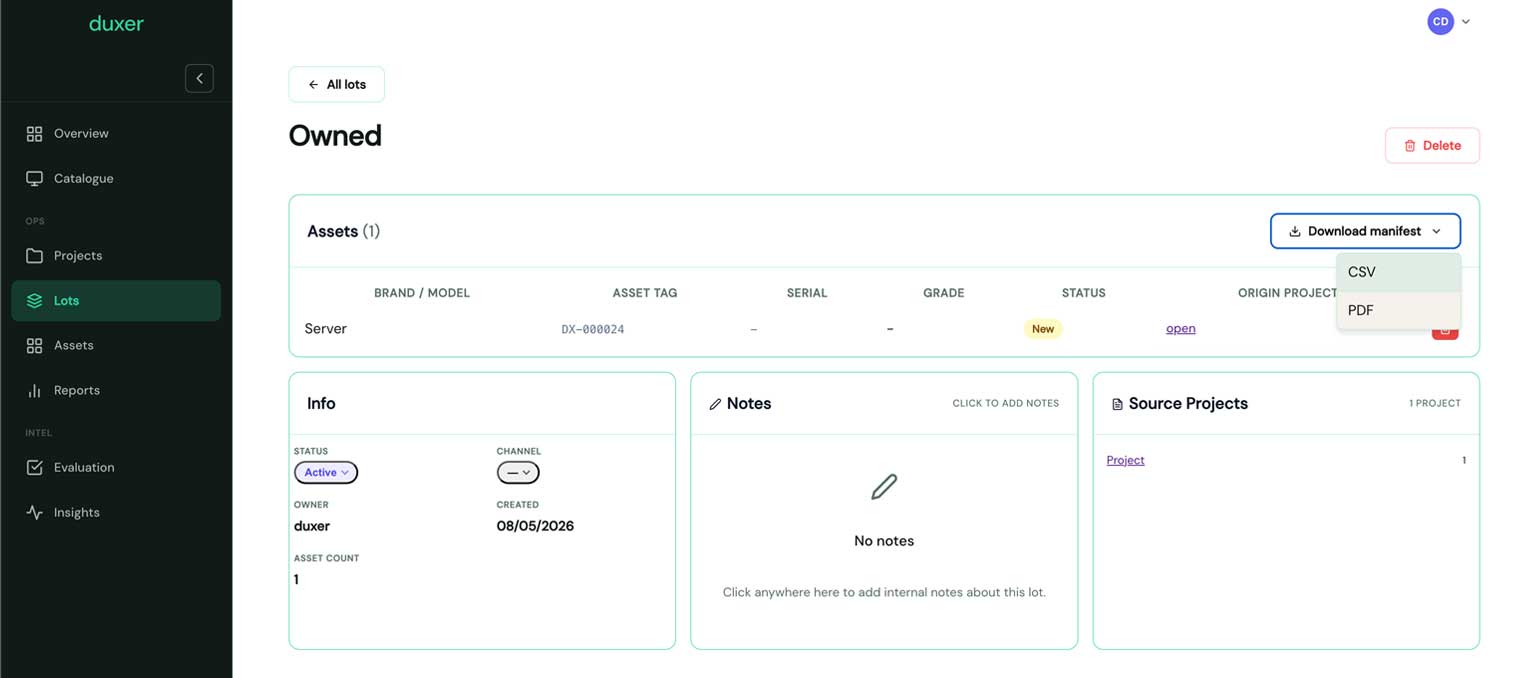
Projects vs Lots
A project is one collection from one client. The unit of work that flows through the status pipeline above. Most of what this page covers operates at the project level.
A lot is a grouping of assets prepared for a trade sale — typically a pallet (or a stack of pallets) sold to a downstream reseller. Lots are an ITAM concept on top of projects, not a replacement for them.
| Project | Lot | |
|---|---|---|
| Origin | One client's collection | A grouping built for trade resale |
| Lifecycle | new → collected → … → disposed | building → listed → sold |
| Holds | Every asset that came in together | Assets cherry-picked across projects |
| Documentation | WTN / Consignment Note / DEFRA RoW | CSV manifest + lot-level photos |
| Audience | Operations + compliance + client | Trade buyers / wholesale partners |
From project to lot
Once assets are at ready (wiped, tested, ready to sell), you decide
how they leave the building:
- Retail — list on the e-commerce front-end. Status flips to
listedthensoldonce a buyer pays. - Trade — assign the asset to a lot. The lot accumulates assets from one or many projects; when it's ready, you publish the lot manifest as a CSV (model, serial, grade, count) and send it to your trade buyers.
Either path keeps the chain-of-custody back to the original project intact — the asset history shows which collection it came from, even after it's been remarketed through a lot.
Lot manifest export
From the lot's page → Export manifest. The CSV carries everything a downstream buyer needs to bid: device type, brand, model, year, serial number, grade, quantity, lot-level price (if set). Compatible with most trade-buyer intake spreadsheets.
DEFRA Digital Waste Tracking
Once you've signed off a transfer document, you can submit the Receipt of Waste record direct to DEFRA's Digital Waste Tracking service from the project page. Each submission is logged on the project with the DEFRA reference returned.
DEFRA integration requires the standard waste-carrier credentials — set these up in Settings → Integrations.
What to read next
- iOS field app — capturing on site.
- Carbon reports — turning the project into an ESG bundle.